I used the same self-drafted princess-seam sloper as I did for my most recent nursing dress, with a few small changes. First, I added a small amount of height to the back shoulder to keep the neckline from pulling backward. I also added a center back seam for a simpler button opening at the top.
I didn't add corseting this time, which brought out the problem of too much ease in the original, but since the fabric I used has some lycra in it, the whole shirt shrank a bit in the dryer and ended up fitting perfectly. However, these photos were taken before washing. =)
The stretch also pulls the shoulder seam downward slightly, which alters the fit of the entire sleeve.... again, they looked better after washing, although still not as nice as they could be. There are no zippers in this shirt either... I was planning on an invisible side zip but with the stretch it was unnecessary.
I changed the sleeves to just-past-half-length and added tulip cuffs:
 |
| This photo looks great... until I upload it. Annoying. =( |
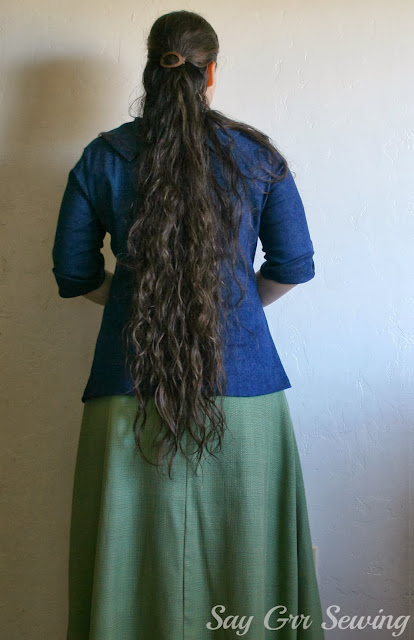
The next thing I added... a collar. I took the neckline measurement, drew a rectangle that matched that with 6 inches of height, then slashed it every inch and flared the bottom edge. My first iteration of the collar was quite a bit too narrow... I think in the version that worked I added three inches for every inch, and it looked to be about 2/3 of a circle.
I cut two of the collar piece with seam allowances, sewed them right sides together, did the usual trim-flip-press, and sewed it to the neckline. I love the way this collar falls... the fabric may have brought out my fitting problems, but it was perfect for this collar. I love the way the back of it looks too, and my absolute favorite detail of this shirt is the button:
Isn't that awesome?! I found these personalized engraved wooden buttons at Pick Your Plum about a year ago (they offered the same deal about a month ago, so it's quite possible that it will show up again) and have been saving them for the right projects. Having a button in the back makes it quite painful to wear my hair down, since it gets caught all too often:
But with three little daughters I usually wear my hair up anyway, so that isn't a huge deal.
I kept the same flare in the hip portion of the shirt as I had in my dress, because when shirts aren't loose on my hips they ride up. I'm not fond of tugging at my shirts all the time, so this worked well. The final details of this shirt are thread-chain button loop and belt loops.
And now I suppose you want to know why I love this shirt so much in spite of all the issues I mentioned. Two reasons:
Firstly, I had a concept in my head for a garment that was much more difficult than most of my projects, and I actually created it. It's not exactly like I'd imagined, but the closest I've come so far.
The second reason is the fabric. It's an incredibly soft denim with a nice amount of stretch and is a beautiful color. The weight worked well for this shirt, but it's plenty thick enough for a skirt. Like the twill in my last post, it's from Nick Of Time Textiles, and I'm really happy with it. Which is a very good thing, since I bought over ten yards of it! I was concerned when it arrived, because it was greyish and waxy, but that turned out to be just a coating that washed right off. I'll be pre-washing an extra time for the next thing I make though... once to remove the coating and once to pre-shrink the fabric.
That is the last of the Thanksgiving photo pieces! On to Christmas stuff now. =)
Thanks for stopping by,


No comments:
Post a Comment